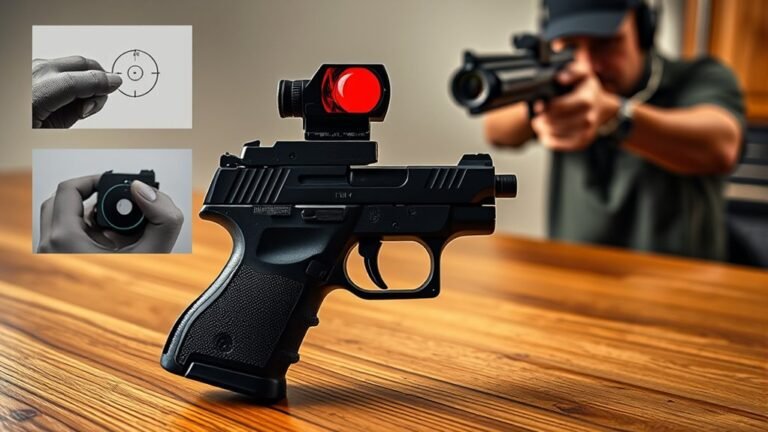
7 Steps to Sight a Red Dot on Your Pistol
To sight your pistol’s red dot sight accurately, start by choosing the right zeroing distance—10, 25, or 50 yards—based on your shooting needs.
Properly aligning the red dot with your bore or iron sights is essential for precision. Use a bore sight or laser to help with this initial alignment.
Next, use a stable rest to shoot consistent groups, which will help you make precise adjustments.
Adjust windage and elevation in small increments to fine-tune your sight.
Confirm your zero at longer ranges to ensure accuracy.
Additionally, manage recoil effectively to maintain a steady sight picture.
Practice smooth trigger control to improve shot consistency.
Follow these steps, and you’ll enhance both precision and confidence with your red dot sight.
Key Takeaways
- Start zeroing at a short distance (about 10 yards) to quickly align the red dot with the point of impact.
- Use bore sight or laser alignment to initially center the red dot over the bore axis for accurate setup.
- Shoot from a stable rest, making small windage and elevation adjustments to refine the red dot’s zero.
- Manage recoil with a firm grip and proper stance to maintain a consistent sight picture during follow-up shots.
- Confirm and fine-tune zero at longer distances (25 to 50 yards) to ensure accuracy across typical shooting ranges.
Why Zeroing Your Pistol Red Dot Matters
Although it might seem like a small step, zeroing your pistol red dot is essential because it guarantees your point of aim aligns with the point of impact. When you zero your red dot properly, you improve your shooting precision, making each shot count. This alignment helps you acquire targets faster and maintain consistent shot placement, especially when every second matters.
Without accurate zeroing, you risk missing your mark due to misaligned point of aim and point of impact. Plus, a well-zeroed red dot reduces the need for constant adjustments during stressful or timed situations. Regularly checking and maintaining your zero guarantees recoil, load variations, or mounting shifts don’t throw off your accuracy, keeping your pistol ready and reliable at all times.
Choose the Best Distance to Start Zeroing
You’ll want to pick the right distance to start zeroing your red dot for the best results. Starting at 10 yards makes adjustments easier and quicker, but zeroing at 25 yards offers more accuracy for typical shooting scenarios.
Understanding how distance affects your adjustments will help you fine-tune your sighting for any range.
Optimal Zeroing Distances
Where should you start zeroing your pistol’s red dot for the best results? Most shooters begin at 10 yards because it’s a short zeroing distance, making quick adjustments easier. After that, moving to 25 yards helps balance close and longer-range accuracy, reducing holdover.
Choosing your zeroing distance depends on your typical shooting scenarios.
| Distance | Purpose | Benefit |
|---|---|---|
| 10 yards | Initial zeroing | Quick, easy adjustments |
| 25 yards | Primary zeroing distance | Balanced accuracy |
| Multiple | Understanding impact | See point of impact shifts |
Start at 10 yards to confirm alignment, then finalize zero at 25 yards for best overall performance.
Impact Of Distance Choice
Because the distance you choose to start zeroing greatly influences your pistol’s accuracy, picking the right range matters. The impact of distance on zeroing is significant; starting at 10 yards makes initial adjustments easier since the bullet’s impact points are closer and simpler to measure.
However, zeroing at 25 yards is often preferred because it balances close-range precision with longer-distance accuracy, matching most shooting scenarios. If you choose 50 yards, be ready for more precise elevation tweaks due to increased bullet drop.
Ultimately, the distance you pick should reflect your typical shooting environment. Selecting the right zeroing distance guarantees your pistol performs reliably, with impact points aligning well across the ranges where you’ll actually use your red dot sight.
Distance-Based Adjustment Tips
Although zeroing your red dot sight can start at various distances, choosing the right one depends on your shooting goals and typical engagement ranges. For practical self-defense, zeroing at 15 or 25 yards works best since it matches common engagement distances. Starting zeroing at 10 yards lets you make quick initial adjustments, helping you dial in your sight before confirming at a longer distance like 25 yards.
If precision shooting is your aim, zeroing at 50 yards may be ideal, but it requires more fine-tuning due to bullet drop. Remember, adjustments made at one distance affect impact points at others because of ballistic trajectory, so pick a distance that balances your needs. This approach guarantees your red dot performs accurately where it matters most.
Align Your Red Dot With the Bore or Iron Sights
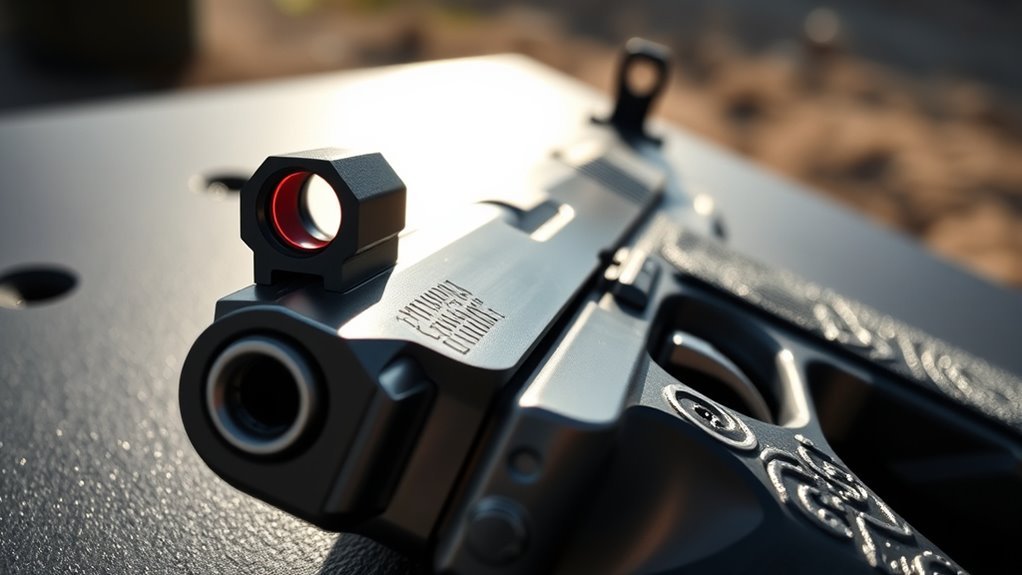
Start by aligning your red dot with the bore or the iron sights to create a reliable reference point. You can use a bore sight or laser to help co-witness the red dot with the barrel or sights quickly.
This guarantees your dot stays centered and accurate as you continue zeroing.
Bore Alignment Techniques
When aligning your red dot, make certain it’s precisely centered over the bore axis to achieve accurate zeroing. Start by using a bore sighter or laser bore guide to line up your red dot sight with the bore before live firing. This bore alignment ensures your sight and barrel share the same trajectory.
To confirm, remove the slide and look through the muzzle end; the bore and red dot should appear perfectly in line. Next, remount the slide and fine-tune the red dot so its point of aim matches the bore’s path at your chosen zero distance.
This process minimizes guesswork and sets a solid foundation for precise zeroing, making your red dot sight reliable and effective on target.
Iron Sight Reference
How do you quickly establish a reliable reference point for your red dot sight? Start by aligning the red dot with your iron sights. Use the iron sights as a baseline to ensure the red dot is centered and properly oriented before moving on to fine zeroing.
Make sure your iron sights are correctly zeroed at your preferred distance since this alignment provides a solid initial reference. During this setup, position the red dot so it coincides with the iron sights’ point of aim. Also, confirm that the bore or iron sights are aligned accurately with the firearm’s barrel.
This careful iron sight reference helps streamline the zeroing process and improves your overall sight alignment, making your red dot setup faster and more precise.
Use a Stable Rest to Shoot Consistent Groups
Because even slight human movement can throw off your shot placement, using a stable rest is essential for shooting consistent groups. A stable rest, like a shooting rest or vice, provides a steady platform that minimizes recoil and prevents your pistol from shifting during firing. This stability reduces flier variability, making your shot groups tighter and more reliable.
When you use a stable rest consistently, you isolate mechanical accuracy from shooter error, which simplifies the zeroing process. By eliminating movement, you can better assess your sight alignment and make precise adjustments.
Ultimately, resting your pistol ensures that your red dot zeroing is faster and more accurate, helping you achieve consistent groups every time you sight in your pistol.
Adjust Windage and Elevation for Precise Zero
Although adjusting windage and elevation can seem intimidating at first, taking small, deliberate steps guarantees you precisely zero your red dot sight. Start by understanding each click usually moves the point of impact about 1 MOA, or 1 inch at 100 yards. At 25 yards, that’s roughly 1/4 inch per click.
To zero your sight effectively, make small, incremental adjustments—no more than half a turn—to avoid over-correcting. Confirm the adjustment direction (clockwise or counterclockwise) matches the desired point of impact shift. Use a stable rest or vice to keep your pistol steady while adjusting.
After each adjustment, shoot a group to verify how windage and elevation changes affect your zero. This methodical approach guarantees your red dot is accurately zeroed for precise shooting.
Confirm and Fine-Tune Your Zero at Longer Ranges
Once you’ve made initial adjustments at close range, confirm your zero at longer distances like 25 or 50 yards to guarantee your red dot stays accurate as range increases. Use a stable rest or bench to reduce human error during this long-range zeroing process. Fire groups, then observe each shot’s impact carefully.
Make small elevation and windage adjustments—usually in 1/4 or 1/2 MOA increments—to fine-tune your zero. Repeat this cycle until the impacts consistently align with your point of aim. Document your zero settings and shot impacts at these distances to track any changes over time.
This method ensures your red dot maintains precise alignment across varying ranges, letting you rely on your pistol’s sighting for accuracy in different shooting scenarios.
Manage Recoil and Maintain a Consistent Sight Picture
To maintain a consistent sight picture, you need to manage recoil effectively so your red dot stays on target after each shot. Proper recoil management reduces movement, helping you keep the red dot aligned for quick follow-up shots. Focus on controlling recoil through your grip and stance to limit the dot’s shift.
This prevents flinching or jerking the trigger, which can cause inaccurate shots.
Keep these tips in mind for effective recoil management:
- Use a firm, consistent grip to absorb recoil.
- Maintain a stable stance to minimize upper body movement.
- Smoothly press the trigger to avoid jerking.
- Practice follow-up shots to quickly reacquire the red dot.
Frequently Asked Questions
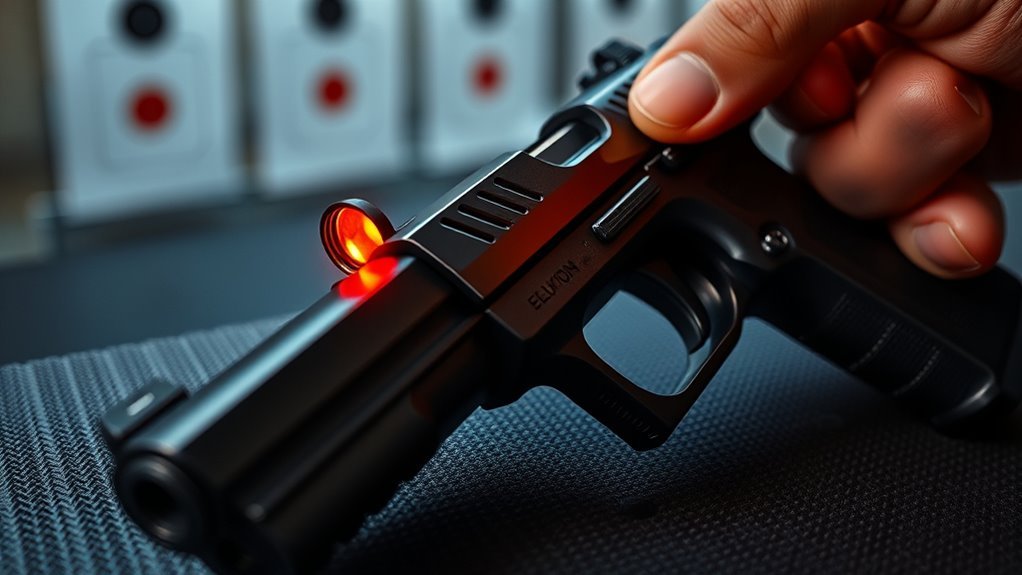
How Should a Red Dot Look on a Pistol?
Your red dot should appear as a clear, bright, and sharply defined circle, about 6 to 8 MOA in size. It stays centered, stable, and easily visible against any background for quick, accurate aiming.
What Should I Sight My Pistol Red Dot At?
You should sight your pistol red dot at 25 yards for balanced accuracy, especially for self-defense or competition. Starting at 10 yards helps with quick adjustments, but choose a distance that matches your typical shooting scenario.
This approach ensures your sighting is effective for most situations you’ll encounter. Adjust as needed based on your specific needs or preferences.
Can I Use a Red Dot With Astigmatism?
Yes, you can use a red dot with astigmatism, but it might look blurry or star-shaped.
Try larger dots, etched reticles, or different LED colors and brightness to improve clarity and target acquisition.
What Distance Do You Zero a Red Dot?
Zero your red dot at 25 yards—it’s like aiming at the bullseye of a clock face. This distance balances precision and practicality, but adjust it to match how and where you plan to shoot most often.
Conclusion
Zeroing your pistol red dot isn’t just a nice-to-have—it’s essential. Did you know that shooters with properly zeroed red dots improve accuracy by up to 40%? By following these steps, you’ll boost your confidence and precision with every shot.
Remember, consistent practice and fine-tuning at various distances make all the difference. Keep managing recoil and maintaining your sight picture, and you’ll see your skills—and your hits—sharpen faster than you might expect.
With dedication to these 7 steps to sight a red dot on your pistol, your accuracy and shooting performance will reach new heights. Stay focused on proper zeroing techniques and watch your shooting skills improve significantly.